

System Requirements
Operating System: macOS 14.0 (Sonoma) or later
Processor: Apple Silicon (M1/M2/M3) natively supported; Intel Macs supported
Storage: Varies based on media usage
Welcome to SillyPages, the lightning-fast, beautifully designed vault for your life’s moments. Built natively for macOS, SillyPages is engineered to handle massive journals with thousands of entries and high-resolution photos without breaking a sweat.
This guide will walk you through the system requirements, core features, and detailed instructions for managing your memories.
Navigating the Interface
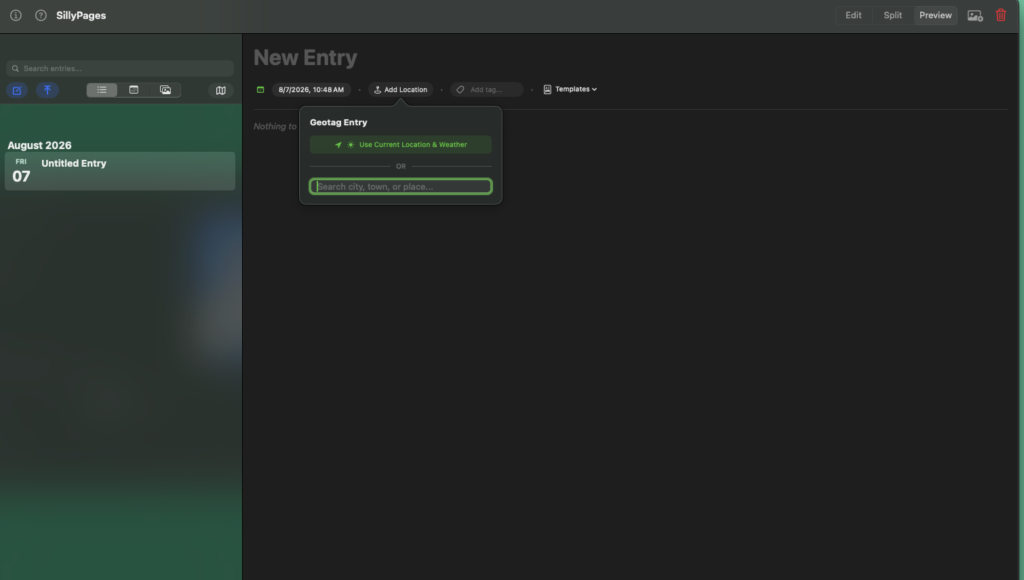
SillyPages uses a clean, native macOS layout divided into two main areas… The Sidebar and The Main Canvas
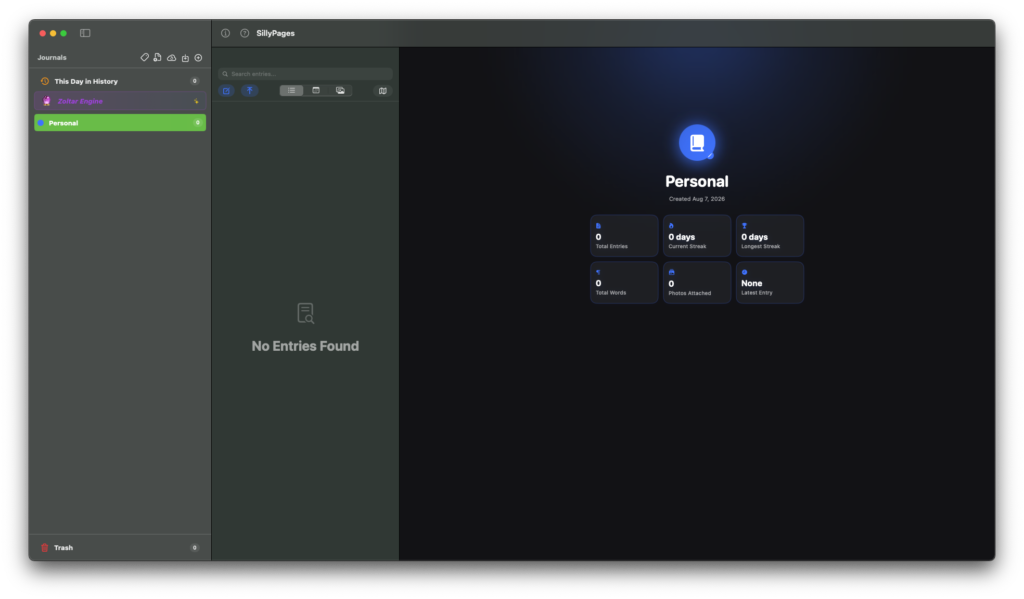
The Sidebar (Left Panel)
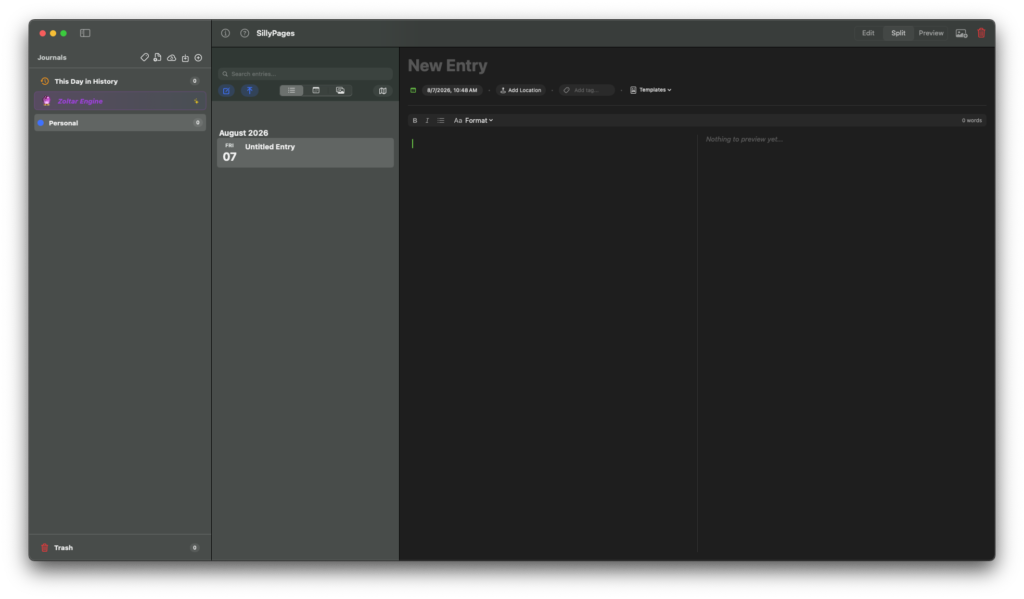
This is your control center. At the top of the sidebar, you will find a dedicated header bar with icons for all major app functions:
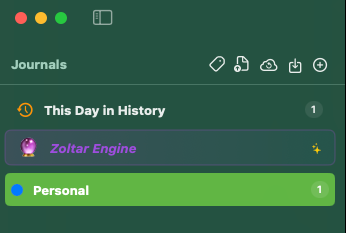
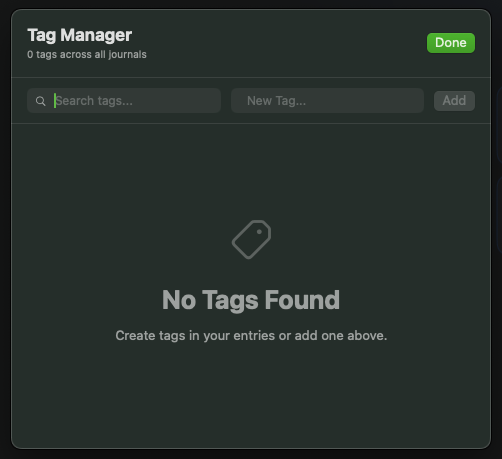
🏷️ Tag Manager (tag icon): Manage, edit, and delete your global tags.
☁️ Restore Backup (arrow.counterclockwise.icloud icon): Restore your SillyPages database from a backup folder.
📥 Import (square.and.arrow.down icon): Import Day One JSON archives.
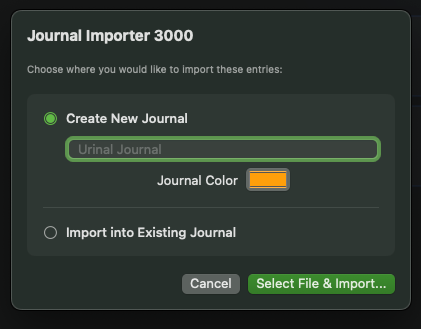
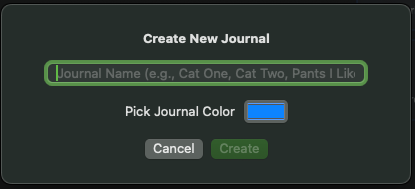
➕ Add Journal (plus.circle icon): Create a new, separate journal vault.
Below the header is your Journals List. You can click on any journal to instantly switch your active view—even if the journal has 5,000+ entries, the switch is instantaneous.
The Main Canvas (Right Panel)
This is where your content lives. It displays the chronological timeline of your entries for the selected journal. You can smoothly scroll through years of memories, view full-resolution photos, and create new entries.
Core Features & How to Use Them
Creating and Managing Journals
You aren’t limited to just one timeline. You can create distinct journals for different purposes (e.g., “Personal Diary,” “Cat Logs,” “Urinal Journal”).
- Click the Add Journal (book.badge.plus) icon in the sidebar header.
- Give your journal a name.
- It will instantly appear in your sidebar list.
Writing Entries & Adding Media
SillyPages allows you to capture text and unlimited high-resolution photos.
Writing: The editor supports standard text entry. (Note: Boilerplate text or repeated daily headers (templates) are automatically stripped out when you export to a PDF, keeping your printed books clean… usually).
Photos: You can attach multiple photos to a single day. The LocalMediaManager safely stores them outside the main database to ensure the app never lags.
The Tagging System
Keep your life organized without friction.
Tagging an Entry: While editing an entry, you can apply custom tags (e.g., #vacation, #hotsnakes, #family).
The Tag Manager: Click the Tag Manager icon in the sidebar to view all tags used across your app. You can rename or delete tags globally from this sheet.
Zoltar (Custom Features)

Looking for some inspiration or cosmic guidance? Head over to the custom “Zoltar Engine” to find the Zoltar integration, featuring Cosmic Rays and Tarot buttons to spark your journaling journey! More coming in the future…
Importing & Exporting Data (Detailed Process)
Moving from another app or restoring a lost database is seamless.
Importing from Day One (JSON)
If you are migrating from Day One, you can bring your entire history into SillyPages.
- Export your Day One data as a JSON Archive from the Day One app.
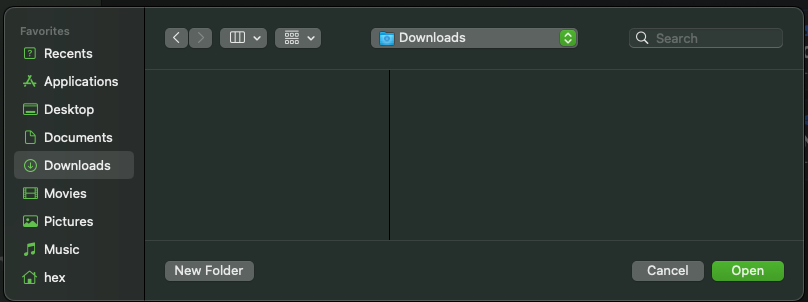
- In SillyPages, click the Import (square.and.arrow.down) icon in the sidebar.
- A file picker will appear. Select the .json file generated by Day One or the folder it downloaded.
- SillyPages will parse the file, import the text, dates, and media, and populate them into your active journal.
Restoring a SillyPages Backup
- Click the Restore Backup (arrow.counterclockwise.icloud) icon.
- Select the folder containing your previous SillyPages database backup.
- The app will securely restore your files and reconnect your media
HONK!